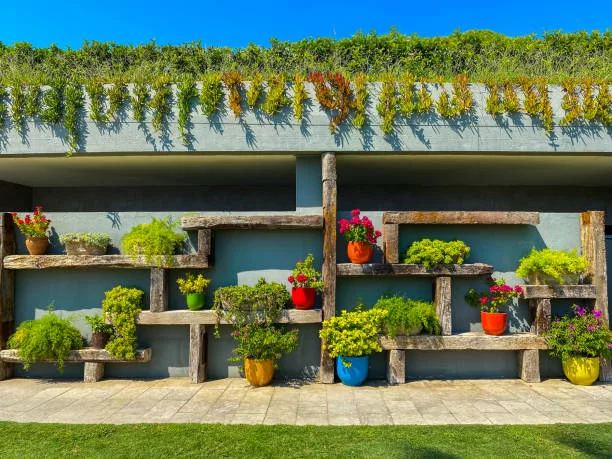
Are you ready to elevate your gardening game to new heights? If you’ve been longing for a unique and space-efficient way to grow your plants, then you’re in for a treat. In this blog post, we’ll dive into the fascinating world of DIY vertical garden systems. These ingenious setups maximize your growing space and add a touch of greenery and beauty to any indoor or outdoor area.
So, keep reading if you’re itching to unleash your creativity and transform that empty wall or unused corner into a lush green oasis. We’ll explore five easy-to-build vertical garden systems that will help you bring nature closer to your doorstep. From repurposed materials to modular designs, we’ve got you covered. Get ready to embark on an exciting journey of green thumb adventure!
DIY Vertical Garden Systems #1: Pallet Paradise: Transforming Old Wooden Pallets into Stunning Vertical Gardens
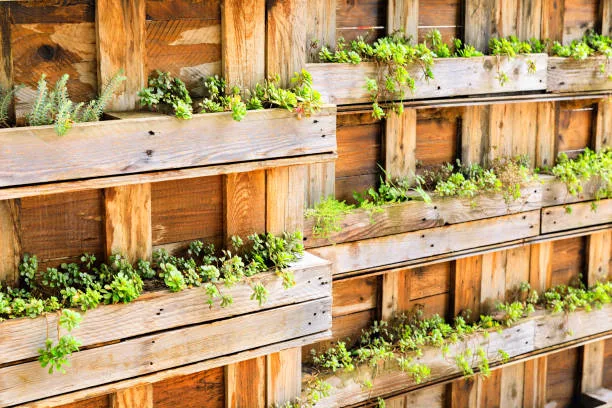
Do you have an old wooden pallet gathering dust in your garage? Don’t let it sit there unused any longer! This section will unveil the secrets of repurposing that humble pallet into a breathtaking vertical garden. With just a few simple tools, a touch of creativity, and a dash of green thumb, you’ll be amazed at how to turn an ordinary pallet into a living work of art. Get ready to embark on a journey of rustic charm and transform your walls into a verdant paradise.
The first step is to prepare the pallet for its garden transformation. Begin by inspecting the pallet for any loose or broken boards. Secure any wobbly parts by hammering in nails or replacing damaged boards. Once your pallet is sturdy and ready, it’s time to give it a fresh look. You can choose to sand the wood for a smoother finish or leave it in its rustic state for a more natural appeal.
Next, it’s time to decide whether you want your pallet garden to stand upright or be mounted horizontally. The choice depends on the available space and your aesthetic preference. If you opt for the vertical approach, secure the pallet to a wall using screws or hooks. For a horizontal setup, you can place the pallet on a sturdy surface or attach legs for stability.
Now comes the exciting part—arranging the plants! Start by lining the back of the pallet with landscape fabric or plastic sheeting to prevent soil from falling out. Fill each opening between the slats with high-quality potting soil, ensuring that it’s evenly distributed. Choose a variety of plants that thrive in vertical environments, such as succulents, herbs, or trailing vines.
Consider the sunlight requirements of your chosen plants and position the pallet accordingly. If you’re mounting it indoors, place it near a window with ample natural light. Outdoors, select a spot that receives the appropriate amount of sunlight for your plant selection. Arrange the plants visually pleasingly, combining different textures, colors, and heights to create an eye-catching display.
Remember to water your vertical garden regularly, as the plants may dry out more quickly in this setup. Use a watering can or a gentle spray attachment to ensure the soil remains adequately moist without oversaturating it. With proper care and maintenance, your pallet paradise will flourish, transforming any plain wall into a breathtaking vertical oasis.
So, don’t let that old wooden pallet go to waste any longer! Follow our step-by-step guide to repurpose it into a stunning vertical garden that captivates the eyes and breathes life into your surroundings. Embrace the rustic charm, unleash your creativity, and turn your walls into a verdant paradise with this DIY pallet project.
Stay tuned for the next section, where we’ll explore the wonders of hanging planters and how they can bring greenery to even the smallest of spaces!
DIY Vertical Garden Systems #1: Pocketful of Greens: Unleashing the Magic of Hanging Planters for Small Spaces
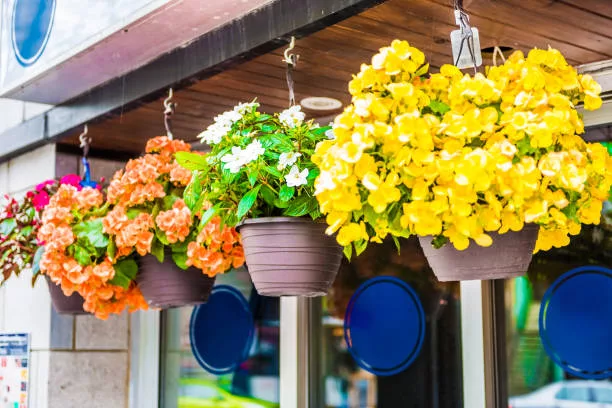
If you find yourself dealing with limited space but yearning for a thriving garden, fear not! This section is dedicated to the power of hanging planters, unlocking the potential to create a stunning vertical garden even in the tiniest of spaces. We’ll take you on a journey through various DIY hanging planter ideas that will breathe life into your surroundings. From repurposed containers to elegant macrame hangers, prepare to discover the secrets of maximizing your vertical space, selecting the perfect plants, and creating a visually captivating arrangement. Get ready to witness the magical transformation of a bare wall or a modest balcony railing into a lush tapestry of vibrant greens.
The beauty of hanging planters lies in their versatility and ability to maximize vertical space. You can transform previously unused areas into vibrant green sanctuaries by suspending your plants. Let’s start with the containers themselves—there are countless options to choose from! You can repurpose old mason jars, tin cans, or even plastic bottles by giving them a new lease on life as unique hanging planters. Be sure to clean and prepare these containers before use, drilling small drainage holes at the bottom to prevent waterlogging.
Macrame hangers are an excellent choice for a touch of elegance and a bohemian vibe. You can create intricate and stylish holders for your beloved plants with a few simple knots. Macrame hangers come in various designs and can be easily customized to suit your aesthetic preferences. Don’t worry if you’re new to macrame; plenty of tutorials and guides are available online to help you master this art form.
Now that your containers or hangers are ready, it’s time to choose the right plants for your hanging garden. Opt for plants that thrive in compact environments and have trailing or cascading growth habits. Some popular choices include pothos, spider plants, trailing petunias, and cascading ferns. These plants beautify your space and add a sense of lushness as they gracefully drape from their hanging perches.
When arranging your hanging planters, consider both aesthetics and practicality. Create a visually appealing arrangement by combining plants of varying textures, colors, and sizes. Place larger and fuller plants at the bottom to create a cascading effect, with smaller and more delicate plants near the top. This arrangement will ensure that each plant receives adequate sunlight and airflow, promoting healthy growth.
To maximize the visual impact of your hanging garden, experiment with different heights and levels. Hang your planters at various lengths, creating a captivating display that adds depth and dimension to your space. Whether you have a compact balcony, a cozy kitchen, or a petite patio, these hanging wonders will transform your surroundings into a green oasis.
Remember to consider the specific needs of each plant, such as watering requirements and lighting preferences. Regularly inspect your hanging planters to ensure they are thriving and adjust their placement if necessary. Water your plants carefully, allowing excess water to drain away to prevent waterlogged roots.
With the power of hanging planters, you can breathe life into any small space, turning it into a flourishing haven of greenery. Embrace the creative possibilities, let your imagination soar, and witness the magical transformation of your walls, ceilings, or railings into a pocketful of greens.
Stay tuned for the next section, where we’ll explore the world of PVC pipe vertical gardens and their modern modular approach!
DIY Vertical Garden Systems #3: Towering Greenery: PVC Pipe Vertical Gardens
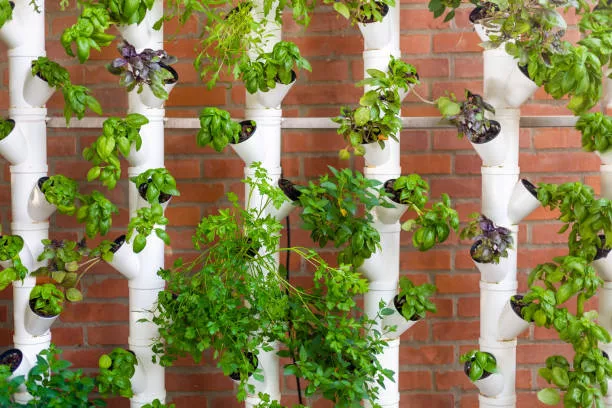
If you’re searching for a modern and modular approach to vertical gardening, your quest ends here! In this section, we’ll immerse ourselves in the fascinating world of PVC pipe vertical gardens. These ingenious systems empower you to craft custom-designed greenery towers suitable for indoor and outdoor settings. Get ready to embark on a journey of construction and creativity as we guide you through the process of building your very own PVC pipe garden. From cutting and assembling the pipes to selecting the perfect plants for vertical growth, prepare to witness your garden ascend to new heights!
Gathering the necessary materials is the first step in creating your PVC pipe vertical garden. Head to your local hardware store to acquire PVC pipes of different diameters and accompanying connectors and adhesives. Opt for sturdy yet lightweight pipes, as they will support the weight of your plants without adding unnecessary strain. Select connectors that allow for various angles and configurations, providing flexibility in designing your vertical garden.
Once you have your materials in hand, it’s time to roll up your sleeves and start cutting and assembling the pipes. Measure and mark the desired lengths for your vertical columns, considering the available space and the height you wish to achieve. Utilize a PVC pipe cutter or a saw to make precise cuts. Remember to wear protective gear such as goggles and gloves to ensure safety during cutting.
With the pipes cut to size, it’s time to connect them using the PVC connectors. Apply PVC adhesive to the inner surface of the connectors and insert the pipes, ensuring a secure and snug fit. This step requires precision and attention to detail, as it forms the structural foundation of your vertical garden. Take your time to align the pipes correctly, and make sure the connectors are firmly in place.
Once the structure is assembled, it’s time to move on to the exciting part—selecting the right plants for vertical growth. Consider plants with shallow root systems, as they are well-suited for this type of gardening. Herbs, salad greens, and trailing flowers are excellent choices for PVC pipe vertical gardens. Pay attention to their light and water requirements to ensure optimal growth. Some popular plant options include thyme, lettuce, strawberries, and trailing petunias.
When it comes to arranging the plants within the PVC pipes, the possibilities are endless. You can place them directly into the pipes, using a high-quality potting mix to provide the necessary nutrients and support. Alternatively, you can use smaller containers or grow bags to hold the plants within the pipes, allowing for easier maintenance and flexibility in rearranging the garden layout.
Ensure proper care and maintenance as your PVC pipe vertical garden begins to flourish. Regularly water your plants, ensuring that excess water drains out to prevent waterlogging. Monitor the growth of the plants and trim them when necessary to maintain an aesthetically pleasing and balanced appearance. Consider adding a liquid fertilizer to the watering routine to provide additional nutrients for healthy and vibrant growth.
One of the advantages of PVC pipe vertical gardens is their versatility. You can adapt and modify the structure as needed, incorporating additional pipes or rearranging the layout to suit your changing plant collection. With time and experience, you can experiment with different plant combinations and arrangements, creating a visually striking masterpiece of towering greenery.
Get ready to witness your garden reaching new heights as you delve into the world of PVC pipe vertical gardens. Embrace the modern and modular approach, unleash your creativity, and revel in the joy of seeing your plants ascend to a whole new level.
Stay tuned for the next section, where we’ll explore the concept of living picture frames and how they can transform your space into living artwork!
DIY Vertical Garden Systems #4: Frame it Up: Living Picture Frames
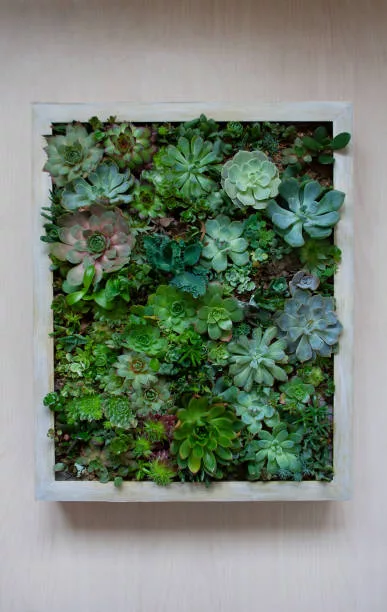
Close your eyes and imagine your garden as a living, breathing work of art. With living picture frames, this dream can become a stunning reality! This section delves into the enchanting world of transforming ordinary frames into captivating vertical gardens. Get ready to discover the materials, techniques, and plant selection required to create these eye-catching masterpieces that will elevate your garden to new heights. Whether you desire a symmetrical arrangement or a wild and organic look, we have all the tips and tricks to turn your vision into a living masterpiece.
Let’s gather the materials needed to create your living picture frame. Start with a frame of your choice. You can repurpose an old picture frame or find one at a thrift store or craft shop that suits your aesthetic preference. Ensure that the frame is sturdy and can withstand outdoor conditions if you plan to display it in your garden. Additionally, gather a piece of backing material such as wire mesh, chicken wire, or burlap to hold the plants in place within the frame.
Once you have your frame and backing material ready, it’s time to consider the plant selection. Opt for plants that can thrive in a vertical environment and are suitable for the lighting conditions of your chosen display area. Consider using a variety of plant species to add visual interest and texture. Trailing vines, colorful foliage, and delicate blooms can all contribute to the overall artistic appeal of your living picture frame. Choose plants with similar growth requirements to ensure they thrive harmoniously together.
Now, let’s move on to the construction process. Start by removing the glass and backing from the picture frame. Cut the backing material to fit the frame, ensuring it is slightly smaller to allow for attachment. Secure the backing material to the frame using staples, nails, or strong adhesive, ensuring it is taut and securely in place. This will create a sturdy foundation for your plants to grow.
With the frame assembled, it’s time to unleash your creativity and arrange the plants within the frame. You can approach this in various ways, depending on the look you want to achieve. For a symmetrical and organized display, consider dividing the frame into sections using vertical strips of backing material or twine. This will create individual pockets for each plant, allowing for a structured and balanced composition. Alternatively, let the plants grow and intertwine naturally for a more organic and free-flowing appearance, creating a lush and untamed masterpiece.
When planting, ensure that each plant has enough space to grow and receive adequate sunlight. Use a high-quality potting mix or a suitable growing medium to provide the necessary nutrients and moisture retention. Consider the water and maintenance requirements of each plant and plan accordingly. Regularly monitor the growth of your living picture frame and trim or prune as needed to maintain the desired shape and appearance.
As your living picture frame evolves and matures, it will become a focal point in your garden, captivating all who behold it. The changing seasons will bring new colors, textures, and growth patterns, transforming your living artwork into an ever-changing masterpiece. Take the time to appreciate and care for your creation, providing water, sunlight, and nourishment as needed to ensure its continued vitality.
Whether you choose to hang your living picture frame on a wall, lean it against a fence, or prop it up on a garden table, it will undoubtedly become a conversation starter and a unique expression of your creative spirit. So, let your imagination run wild, experiment with different plant combinations, and watch as your garden becomes a living gallery of awe-inspiring beauty.
Stay tuned for the final section, where we’ll explore the wonders of cascading vertical planters and how they can transform your space into a mesmerizing waterfall of green
DIY Vertical Garden Systems #5: Hanging Gardens of Green: Cascading Vertical Planters
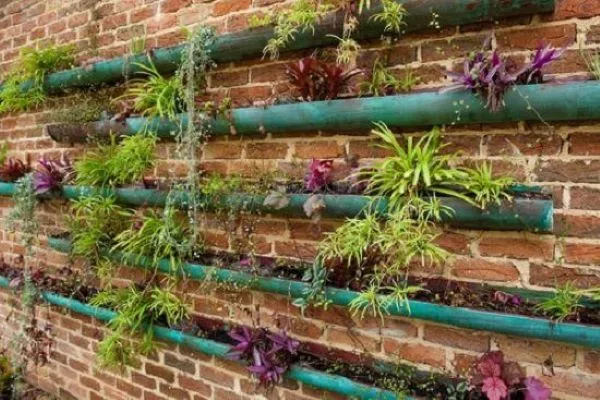
Welcome to the final section, where we’re about to take vertical gardening to new heights—literally! Get ready to be captivated by the beauty of cascading vertical planters, which offer a mesmerizing waterfall of lush foliage. This section will delve into various DIY ideas to help you create stunning cascades of greenery, leaving your friends and neighbors green with envy. From repurposing gutters to utilizing shoe organizers and hanging baskets, we’ll unlock the secrets to transforming your vertical space into a breathtaking botanical wonderland.
Let’s begin by exploring the idea of repurposing gutters to create your cascading vertical planters. Gutters, typically used for rainwater drainage, can be transformed into remarkable planters that add a touch of uniqueness to your vertical garden. Start by selecting a sturdy gutter made of PVC, aluminum, or galvanized steel. Measure the desired length and cut the gutter accordingly, ensuring it fits your available space. Use end caps or sealant to close off the ends of the gutter, preventing soil and water from spilling out.
Next, create drainage holes along the length of the gutter to prevent water from pooling and potentially damaging the plant’s roots. These holes will ensure proper water flow and drainage, keeping your plants healthy and thriving. Consider using a small drill or a heated nail to create evenly spaced holes, taking care not to overcrowd or compromise the structural integrity of the gutter.
Once your gutter planter is prepared, it’s time to select the perfect plants for cascading beauty. Opt for trailing or cascading plant varieties that will gracefully spill over the edges, creating an enchanting waterfall effect. Some popular choices include trailing ivy, cascading petunias, or the vibrant foliage of creeping Jenny. Ensure that the plants are suitable for the lighting conditions of your chosen display area and consider their growth habits to achieve the desired cascading effect.
Fill the gutter with a well-draining potting mix or a soilless growing medium to plant your cascading vertical garden. Gently insert the plants into the openings, allowing their foliage to spill over the sides. Arrange them in a visually appealing manner, balancing colors, textures, and growth patterns. Remember to consider the space requirements of each plant to avoid overcrowding, which could hinder their growth and vitality.
Now, let’s explore another creative approach to cascading vertical planters: utilizing shoe organizers. These versatile and inexpensive items can be repurposed into fabulous hanging gardens. Choose a shoe organizer made of durable and breathable material, such as canvas or mesh, to provide proper air circulation for the plant roots. Hang the shoe organizer on a wall, fence, or railing using hooks or adhesive strips, ensuring it is securely fastened.
Related Article – 20 Affordable Backyard Ideas For Under $40
Are you tired of looking at your bland backyard, wishing you had a space you could enjoy without breaking the bank? Well, I have great news for you! In this article, I will share 20 incredible and affordable backyard ideas that will transform your outdoor space for under $40. Have you ever wondered how to … Read More >>
Once your shoe organizer is in place, filling each pocket with soil or a suitable growing medium is time. Consider using a lightweight potting mix to prevent unnecessary strain on the structure. Select various plants that will thrive in compact pockets, ensuring they have similar water and light requirements. Trailing herbs, delicate ferns, and vibrant flowering plants are excellent choices for creating a visually captivating display.
Another option for cascading vertical planters is utilizing hanging baskets. These versatile containers come in various shapes, sizes, and materials, allowing you to unleash your creativity. Hang the baskets from a sturdy hook or mount them on a wall using brackets. Fill each basket with a well-draining potting mix, ensuring drainage holes are at the bottom.
When selecting plants for hanging baskets, consider those with trailing or vining growth habits. Mix and match different varieties to create a captivating tapestry of colors and textures. You can choose from a range of options, including cascading
Embrace the Green Revolution and Transform Your Space into a Botanical Haven!
In conclusion, “5 Easy DIY Vertical Garden Systems: Green Up Your Space with Creativity!” has explored a world of possibilities for bringing nature closer to our living spaces. Through the ingenious concepts of pallet gardens, hanging planters, PVC pipe vertical gardens, living picture frames, and cascading vertical planters, we’ve discovered how to create stunning and unique vertical gardens that will leave a lasting impact.
Throughout this article, we’ve witnessed the transformative power of creativity and the joy of cultivating our own green sanctuaries. We’ve learned how to repurpose everyday items, utilize small spaces, and embrace modern approaches to gardening. The possibilities for greenery abound, from rustic pallet paradises to mesmerizing cascades of foliage.
By engaging in these DIY projects, we beautify our surroundings and contribute to a greener and more sustainable world. Vertical gardens maximize space, improve air quality, and create habitats for beneficial insects and pollinators. They bring a sense of calm and serenity, transforming blank walls, empty corners, and unused spaces into vibrant and living works of art.
So, don’t be afraid to unleash your creativity, experiment with different plant combinations, and let your imagination run wild. Whether you have a sprawling backyard or a compact balcony, a vertical garden system is perfect for you. Connect with nature, nurture your green thumb, and witness the magic that unfolds when we bring the beauty of the outdoors into our everyday lives.
Let’s embark on this green revolution together. Let’s create pockets of paradise where plants thrive, and our spirits are rejuvenated. It’s time to turn our spaces into botanical havens that inspire, captivate, and nourish our souls. The power to transform our surroundings lies in our hands. Let’s embrace the journey, for our imagination knows no bounds.
So, gather your tools and materials, and get ready to embark on a green adventure like no other. It’s time to green up your space creatively, one DIY vertical garden system at a time.
Remember, the possibilities are endless when it comes to cultivating your own vertical garden. From pallet paradises to cascading wonders, the choice is yours. So, go ahead and get your hands dirty, breathe life into your space, and watch as your creativity blossoms alongside your green oasis.
Now, it’s your turn to bring nature closer to your doorstep. Let your imagination soar, let your fingers dig into the soil, and let the magic of DIY vertical gardening transform your space into a haven of greenery and beauty.
Start now and witness the remarkable transformation that awaits you. Your journey to a greener and more vibrant world begins today.
Happy gardening, my fellow green thumbs!

Hi there, I’m Mark Apletree, a gardening enthusiast with a passion for gardening, and gardening tools. I’ll be your go-to guide for all things related to gardening. The purpose of this website is to assist you in selecting the most suitable garden gear that meets your specific requirements.
See All Posts
