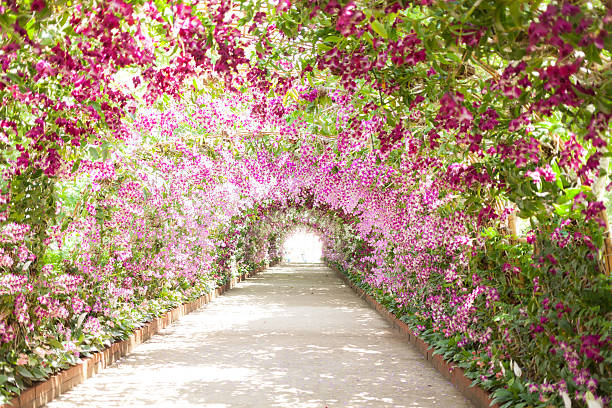
Flowers Starting with C are some of the most enchanting and captivating blooms you’ll find in any garden. From the classic Carnations to the exotic Cattleya Orchids, there’s no shortage of stunning options to choose from. If you’re on the hunt for the perfect flowers to add to your garden or simply want to appreciate the beauty of nature, this list of 20 captivating flowers starting with C will inspire you. So, let’s dive in and discover some of the most breathtaking blooms that begin with the letter C!
Why Use Flowering Plants That Start With C?
Flowering plants that start with C are a wonderful addition to any garden, landscape, or floral arrangement. Not only do they add color and vibrancy, but they can also bring a sense of calm and tranquility to any space. Here are just a few reasons why you might want to consider using flowering plants that start with C:
- Diverse selection: With so many options to choose from, you’re sure to find a flowering plant that perfectly matches your style and aesthetic.
- Long blooming period: Many flowering plants that start with C have a long blooming period, meaning you’ll enjoy their beauty for weeks or even months.
- Easy to care for: Many of these plants are low-maintenance and easy to care for, making them a great choice for beginner gardeners or those with busy schedules.
- Attract pollinators: Flowers are important nectar and pollen sources for bees, butterflies, and other pollinators. Incorporating flowering plants into your garden or landscape can help support these important creatures and contribute to a healthy ecosystem.
- Health benefits: Some flowering plants that start with C, like chamomile and calendula, have medicinal properties and are used in herbal remedies. In addition, studies have shown that exposure to nature and greenery can positively impact mental health and well-being.
Overall, using flowering plants that start with C is a great way to enhance the beauty and health of your outdoor spaces.
1. Carnation
Carnations are a classic garden staple known for their sweet fragrance and delicate beauty. These easy-to-grow perennials come in a wide range of colors and sizes, making them a versatile choice for any garden or floral arrangement. To ensure your Carnations thrive, here are some helpful planting tips:
First, choose a sunny location with well-draining soil. Carnations prefer slightly alkaline soil with a pH of 6.0 to 7.0. If your soil is too acidic, add some lime to raise the pH level.
Next, prepare the planting site by loosening the soil to a depth of at least 12 inches. Add some organic matter, such as compost or aged manure, to the soil to improve its texture and fertility.
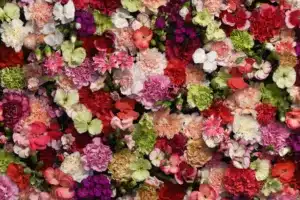
When planting your Carnations, make sure to space them at least 12 inches apart to allow for good air circulation. Dig a hole that’s slightly larger than the root ball, and backfill with soil, pressing firmly around the base of the plant.
Water your Carnations deeply and regularly, making sure not to overwater. A good rule of thumb is to water when the top inch of soil feels dry to the touch.
Lastly, deadhead your Carnations regularly to encourage continued blooming. Simply pinch off the faded flowers just below the base of the stem.
With these simple planting tips, your Carnations are sure to thrive and bring a burst of color and fragrance to your garden.
2. Chrysanthemum
Chrysanthemums, also known as mums, are a beloved fall flower known for their bright colors and long blooming season. These perennials are easy to grow and come in a variety of shapes and sizes, making them a popular choice for gardens and outdoor spaces. Here are some helpful planting tips for Chrysanthemums:
First, choose a planting location that receives at least six hours of direct sunlight per day. Chrysanthemums thrive in well-draining soil that’s rich in organic matter. If your soil is heavy or clay-like, amend it with compost or peat moss to improve drainage.
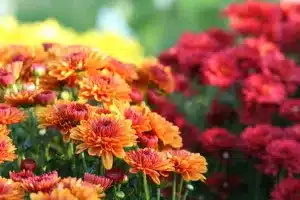
Next, dig a hole that’s slightly larger than the root ball and backfill with soil, pressing firmly around the base of the plant. Water deeply after planting to help settle the soil and encourage root growth.
When caring for your Chrysanthemums, it’s important to provide regular water and fertilizer. Water deeply once a week, or more often during hot, dry weather. Apply a balanced fertilizer every two to three weeks during the growing season to promote healthy growth and blooming.
To keep your Chrysanthemums looking their best, it’s important to deadhead regularly. Simply pinch off the faded flowers just below the base of the stem. This will encourage continued blooming and prevent the plant from going to seed too quickly.
By following these simple planting tips, you can enjoy a beautiful display of Chrysanthemums in your garden or outdoor space for years to come.
3. Cosmos
Cosmos are an easy-to-grow annual flower that produce a stunning display of delicate, daisy-like blooms. These hardy plants are tolerant of a wide range of growing conditions and are a great choice for beginner gardeners or those looking to add some color to their landscape. Here are some helpful planting tips for Cosmos:
First, choose a sunny location with well-draining soil. Cosmos prefer soil that’s slightly acidic and nutrient-rich. If your soil is heavy or clay-like, amend it with compost or peat moss to improve drainage.
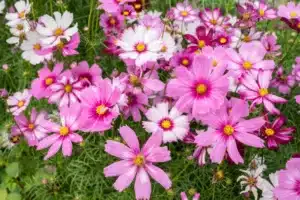
Next, sow the seeds directly into the soil after the last frost date. Simply sprinkle the seeds on the soil surface and lightly press them into the soil. Water gently to avoid washing away the seeds.
When caring for your Cosmos, it’s important to provide regular water and fertilizer. Water deeply once a week, or more often during hot, dry weather. Apply a balanced fertilizer every four to six weeks during the growing season to promote healthy growth and blooming.
To keep your Cosmos looking their best, deadhead regularly. Simply pinch off the faded flowers just below the base of the stem. This will encourage continued blooming and prevent the plant from going to seed too quickly.
Finally, if you want to encourage your Cosmos to reseed for next year, allow some of the flowers to go to seed and drop naturally. This will ensure a new crop of plants for next season.
With these simple planting tips, you can enjoy a stunning display of Cosmos in your garden or landscape all season long.
4. Canna
Cannas, also known as Canna lilies, are a bold and dramatic flowering plant that are sure to make a statement in any garden or landscape. These tropical plants produce stunning, vibrant blooms in shades of red, orange, yellow, and pink, and are known for their large, lush foliage. Here are some helpful planting tips for Cannas:
First, choose a planting location that receives full sun to partial shade. Cannas prefer well-draining soil that’s rich in organic matter. If your soil is heavy or clay-like, amend it with compost or peat moss to improve drainage.
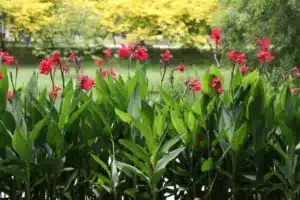
Next, plant the rhizomes (thick, fleshy root-like structures) with the eyes facing up, about 4-6 inches deep and 12-18 inches apart. Water well after planting to help settle the soil and encourage root growth.
When caring for your Cannas, it’s important to provide regular water and fertilizer. Water deeply once a week, or more often during hot, dry weather. Apply a balanced fertilizer every four to six weeks during the growing season to promote healthy growth and blooming.
To keep your Cannas looking their best, remove any dead or damaged leaves as they occur. This will prevent disease and improve the overall appearance of the plant.
Finally, if you live in a colder climate, you may need to dig up your Cannas in the fall and store the rhizomes indoors for the winter. To do this, wait until after the first frost, then carefully dig up the rhizomes, dry them out for a few days, and store them in a cool, dry location until spring.
The botanical name for Canna is Canna x generalis. With these simple planting tips, you can enjoy a stunning display of Cannas in your garden or landscape for years to come.
5. Camellia
Camellias are a classic and elegant flowering shrub that produce stunning blooms in shades of pink, red, and white. These evergreen plants are known for their glossy, dark green foliage, and are a popular choice for adding structure and beauty to any garden or landscape. Here are some helpful planting tips for Camellias:
First, choose a planting location that receives partial shade to full shade. Camellias prefer well-draining soil that’s rich in organic matter. If your soil is heavy or clay-like, amend it with compost or peat moss to improve drainage.
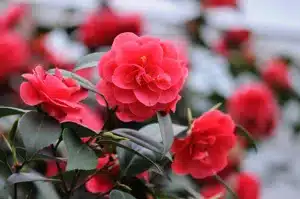
Next, dig a hole that’s slightly larger than the root ball and backfill with soil, pressing firmly around the base of the plant. Water deeply after planting to help settle the soil and encourage root growth.
When caring for your Camellias, it’s important to provide regular water and fertilizer. Water deeply once a week, or more often during hot, dry weather. Apply a fertilizer specifically formulated for Camellias every four to six weeks during the growing season to promote healthy growth and blooming.
To keep your Camellias looking their best, prune lightly after flowering to shape the plant and remove any dead or damaged branches. Avoid heavy pruning, as this can damage the plant and reduce blooming.
Finally, if you live in a colder climate, choose a Camellia variety that is hardy in your area. The botanical name for Camellia is Camellia japonica, and there are many different cultivars available with varying levels of cold tolerance.
With these simple planting tips, you can enjoy a stunning display of Camellias in your garden or landscape year after year.
6. Crocus
Crocuses are a delightful and charming spring-blooming bulb that produce beautiful, cup-shaped flowers in shades of purple, yellow, and white. These hardy plants are some of the first flowers to emerge in the spring, signaling the end of winter and the start of a new growing season. Here are some helpful planting tips for Crocuses:
First, choose a planting location that receives full sun to partial shade. Crocuses prefer well-draining soil that’s not too heavy or compact. If your soil is heavy or clay-like, amend it with sand or compost to improve drainage.
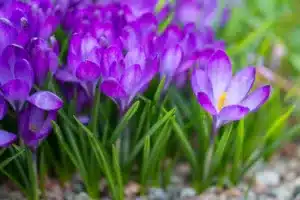
Next, plant the bulbs in the fall, about 2-4 inches deep and 2-4 inches apart. Water well after planting to help settle the soil and encourage root growth.
When caring for your Crocuses, it’s important to provide regular water and fertilizer. Water deeply once a week, or more often during hot, dry weather. Apply a balanced fertilizer in the spring when new growth appears to promote healthy blooming.
To keep your Crocuses looking their best, deadhead the flowers as they fade. This will encourage continued blooming and prevent the plant from going to seed too quickly.
Finally, if you live in a colder climate, cover your Crocus bulbs with a layer of mulch or straw in the winter to protect them from freezing temperatures. The botanical name for Crocus is Crocus vernus, and there are many different cultivars available with varying bloom times and colors.
With these simple planting tips, you can enjoy a beautiful display of Crocuses in your garden or landscape each spring.
FAQ’s About The Crocus
Where Do Crocus Grow Best?
Crocuses grow best in areas with a cold winter and a mild spring, making them well-suited for planting in USDA hardiness zones 3 to 8. They prefer full sun to partial shade and well-draining soil that’s not too heavy or compact. Crocuses can be planted in garden beds, borders, rock gardens, or even in containers, as long as they receive adequate sunlight and moisture. They are also great for naturalizing in lawns, meadows, and wooded areas. In general, Crocuses are hardy and adaptable plants that can thrive in a variety of growing conditions, making them a great choice for gardeners of all skill levels.
Is Crocus The Same As Saffron?
The Crocus plant and saffron spice are related, but they are not exactly the same. Saffron is actually derived from the stigmas of the Crocus sativus plant, which is a specific variety of Crocus. This variety is commonly referred to as the saffron crocus and is primarily grown for the production of saffron, one of the world’s most expensive spices.
While other varieties of Crocus produce lovely blooms, they do not produce saffron spice. So, if you want to grow your own saffron, you will need to specifically plant the Crocus sativus variety. It’s important to note that saffron production is labor-intensive and requires a large number of plants to yield even a small amount of saffron, so it may not be the most practical option for most home gardeners.
7. Calla Lily
Calla Lilies, also known as Zantedeschia, are an elegant and sophisticated flowering plant that produce stunning, trumpet-shaped blooms in shades of white, pink, yellow, and red. These hardy plants are native to South Africa and are a popular choice for adding color and texture to any garden or landscape. Here are some helpful planting tips for Calla Lilies:
First, choose a planting location that receives full sun to partial shade. Calla Lilies prefer well-draining soil that’s rich in organic matter. If your soil is heavy or clay-like, amend it with compost or peat moss to improve drainage.
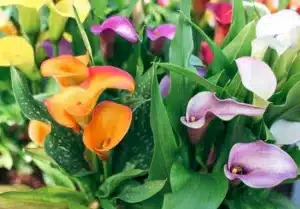
Next, plant the rhizomes (thick, fleshy root-like structures) about 4-6 inches deep and 12-18 inches apart. Water well after planting to help settle the soil and encourage root growth.
When caring for your Calla Lilies, it’s important to provide regular water and fertilizer. Water deeply once a week, or more often during hot, dry weather. Apply a balanced fertilizer every four to six weeks during the growing season to promote healthy growth and blooming.
To keep your Calla Lilies looking their best, remove any dead or damaged leaves as they occur. This will prevent disease and improve the overall appearance of the plant.
Finally, if you live in a colder climate, you may need to dig up your Calla Lily rhizomes in the fall and store them indoors for the winter. To do this, wait until after the first frost, then carefully dig up the rhizomes, dry them out for a few days, and store them in a cool, dry location until spring.
The botanical name for Calla Lily is Zantedeschia aethiopica. With these simple planting tips, you can enjoy a beautiful display of Calla Lilies in your garden or landscape for years to come.
FAQ’s About The Calla Lily
How Long Do Calla Lilies Last?
The blooming period of Calla Lilies can vary depending on the growing conditions and the specific variety of plant. In general, the blooms of Calla Lilies can last anywhere from two to four weeks. However, the overall lifespan of the plant can be much longer. With proper care and maintenance, Calla Lilies can continue to produce new blooms for several months, and even up to a year or more. It’s important to deadhead regularly to promote continued blooming, and to provide adequate water, fertilizer, and sunlight to keep the plant healthy and thriving. With the right care, Calla Lilies can be a beautiful and long-lasting addition to any garden or landscape.
Do Calla Lilies Grow Better In Pots Or In The Ground?
Calla Lilies can be grown successfully in both pots and in the ground, depending on your preference and growing conditions. In pots, Calla Lilies can be moved indoors during colder months or placed in a location with more shade or protection from strong winds. Potted Calla Lilies also allow for more control over the soil conditions and moisture levels, which can be beneficial in areas with heavy or poorly-draining soil.
When planted in the ground, Calla Lilies can benefit from the increased space and nutrients available in the soil. They can also form clumps over time, creating a fuller and more impressive display of blooms. However, in areas with colder winters, it may be necessary to dig up the rhizomes and store them indoors to protect them from freezing temperatures.
Ultimately, the decision to grow Calla Lilies in pots or in the ground will depend on your specific growing conditions and needs. With proper care and maintenance, Calla Lilies can thrive in both settings and produce stunning blooms year after year.
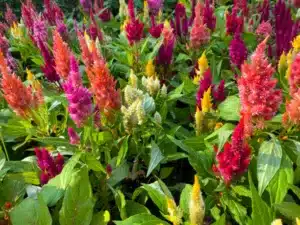
8. Celosia
Celosias are a beautiful and unique flowering plant that produce vibrant, flame-shaped blooms in shades of red, orange, yellow, pink, and purple. These hardy annuals are native to tropical regions of Asia and Africa, and are a popular choice for adding color and texture to gardens, borders, and containers. Here are some helpful planting tips for Celosias:
First, choose a planting location that receives full sun to partial shade. Celosias prefer well-draining soil that’s not too heavy or compact. If your soil is heavy or clay-like, amend it with compost or sand to improve drainage.
Next, sow the seeds directly into the soil after the last frost date, or start the seeds indoors four to six weeks before the last frost. Plant the seeds about a quarter inch deep and 6-12 inches apart. Water gently to avoid washing away the seeds.
When caring for your Celosias, it’s important to provide regular water and fertilizer. Water deeply once a week, or more often during hot, dry weather. Apply a balanced fertilizer every two to three weeks during the growing season to promote healthy growth and blooming.
To keep your Celosias looking their best, deadhead regularly. Simply pinch off the faded flowers just below the base of the stem. This will encourage continued blooming and prevent the plant from going to seed too quickly.
The botanical name for Celosia is Celosia argentea, and there are many different cultivars available, including the popular “cockscomb” variety with its distinctive, ruffled blooms. With these simple planting tips, you can enjoy a stunning display of Celosias in your garden, border, or container all season long.
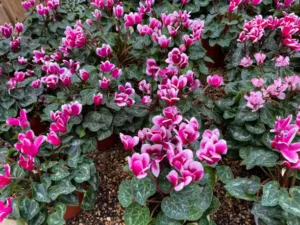
9. Cyclamen
Cyclamens are a delicate and charming flowering plant that produce beautiful, butterfly-shaped blooms in shades of pink, red, white, and purple. These plants are native to the Mediterranean and are a popular choice for adding color and texture to indoor spaces, as well as outdoor gardens and borders. Here are some helpful planting tips for Cyclamens:
First, choose a planting location that receives bright, indirect light. Cyclamens prefer well-draining soil that’s not too heavy or compact. If your soil is heavy or clay-like, amend it with perlite or sand to improve drainage.
Next, plant the tubers about an inch deep and 6-8 inches apart. Water gently to avoid washing away the tubers.
When caring for your Cyclamens, it’s important to provide regular water and fertilizer. Water thoroughly, but allow the soil to dry out slightly between waterings. Avoid getting water on the leaves or tubers, as this can cause rot. Apply a balanced fertilizer every two to four weeks during the growing season to promote healthy growth and blooming.
To keep your Cyclamens looking their best, deadhead the flowers as they fade. This will encourage continued blooming and prevent the plant from going to seed too quickly.
The botanical name for Cyclamen is Cyclamen persicum, and there are many different cultivars available, including miniature and trailing varieties. Cyclamens are commonly used as indoor houseplants, but they can also be grown outdoors in mild climates or as seasonal container plants. With these simple planting tips, you can enjoy a beautiful display of Cyclamens in your indoor or outdoor space.
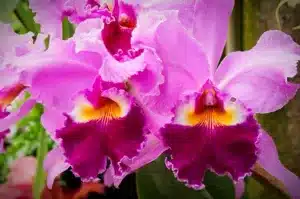
10. Cattleya Orchid
Cattleya Orchids, also known as “Cattleyas”, are a striking and elegant orchid that produce beautiful, fragrant blooms in shades of pink, purple, white, and yellow. These epiphytic plants are native to Central and South America, and are a popular choice for orchid enthusiasts and collectors. Here are some helpful planting tips for Cattleyas:
First, choose a planting location that receives bright, indirect light. Cattleyas prefer well-draining soil that’s not too heavy or compact. If you’re planting in a pot, use a specialized orchid potting mix that contains bark, sphagnum moss, and perlite or other drainage material.
Next, plant the orchid in a pot or hanging basket, allowing the roots to be exposed to the air. Cattleyas are epiphytes, which means they grow on trees in nature, so they don’t require soil to thrive. Water the orchid deeply, but allow the potting mix to dry out slightly between waterings.
When caring for your Cattleyas, it’s important to provide regular water and fertilizer. Apply a balanced fertilizer every two to four weeks during the growing season to promote healthy growth and blooming.
To keep your Cattleyas looking their best, provide adequate humidity and air circulation. Cattleyas prefer a humid environment, so you may need to mist the leaves occasionally or use a humidifier in dry indoor conditions. In addition, make sure the orchid is placed in a location with good air circulation to prevent fungal or bacterial growth.
The botanical name for Cattleya Orchids is Cattleya spp., and there are many different hybrids and cultivars available. Cattleyas are prized for their beautiful blooms and delicate fragrance, making them a great choice for orchid enthusiasts and collectors. With these simple planting tips, you can enjoy a stunning display of Cattleyas in your indoor or outdoor space.
11. Coral Bells
Coral Bells, also known as Heuchera, are a lovely and versatile perennial plant that produce delicate, bell-shaped flowers in shades of pink, red, white, and coral. These plants are native to North America and are a popular choice for adding color and texture to gardens, borders, and containers. Here are some helpful planting tips for Coral Bells:
First, choose a planting location that receives partial shade to full sun. Coral Bells prefer well-draining soil that’s not too heavy or compact. If your soil is heavy or clay-like, amend it with compost or other organic matter to improve drainage.
Next, plant the Coral Bells in a hole that’s slightly wider than the root ball. Water thoroughly after planting to help settle the soil and encourage root growth.
When caring for your Coral Bells, it’s important to provide regular water and fertilizer. Water deeply once a week, or more often during hot, dry weather. Apply a balanced fertilizer every four to six weeks during the growing season to promote healthy growth and blooming.
To keep your Coral Bells looking their best, deadhead the flowers as they fade. This will encourage continued blooming and prevent the plant from going to seed too quickly. You can also remove any damaged or dead leaves to improve the overall appearance of the plant.
The botanical name for Coral Bells is Heuchera spp., and there are many different cultivars available, including those with colorful foliage and interesting textures. Coral Bells are a hardy and low-maintenance plant that can thrive in a variety of growing conditions, making them a great choice for gardeners of all skill levels. With these simple planting tips, you can enjoy a beautiful display of Coral Bells in your garden, border, or container all season long.
12. Coreopsis
Coreopsis, also known as tickseed, is a cheerful and easy-to-grow perennial plant that produces masses of bright, daisy-like flowers in shades of yellow, pink, and red. These plants are native to North America and are a popular choice for adding color and texture to gardens, borders, and containers. Here are some helpful planting tips for Coreopsis:
First, choose a planting location that receives full sun to partial shade. Coreopsis prefers well-draining soil that’s not too heavy or compact. If your soil is heavy or clay-like, amend it with compost or other organic matter to improve drainage.
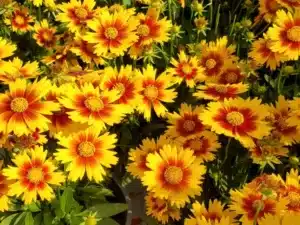
Next, plant the Coreopsis in a hole that’s slightly wider than the root ball. Water thoroughly after planting to help settle the soil and encourage root growth.
When caring for your Coreopsis, it’s important to provide regular water and fertilizer. Water deeply once a week, or more often during hot, dry weather. Apply a balanced fertilizer every four to six weeks during the growing season to promote healthy growth and blooming.
To keep your Coreopsis looking their best, deadhead the flowers as they fade. This will encourage continued blooming and prevent the plant from going to seed too quickly. You can also remove any damaged or dead leaves to improve the overall appearance of the plant.
The botanical name for Coreopsis is Coreopsis spp., and there are many different cultivars available, including those with colorful foliage and interesting textures. Coreopsis is a hardy and low-maintenance plant that can thrive in a variety of growing conditions, making it a great choice for gardeners of all skill levels. With these simple planting tips, you can enjoy a beautiful display of Coreopsis in your garden, border, or container all season long.
13. Chinese Hibiscus
The Chinese Hibiscus, also known as Hibiscus rosa-sinensis, is a stunning and exotic flowering shrub that produces large, showy blooms in shades of red, pink, yellow, orange, and white. This tropical plant is native to East Asia and is a popular choice for adding color and beauty to gardens, landscapes, and indoor spaces. Here are some helpful planting tips for the Chinese Hibiscus:
First, choose a planting location that receives full sun to partial shade. Chinese Hibiscus prefers well-draining soil that’s rich in organic matter. If your soil is heavy or clay-like, amend it with compost or other organic matter to improve drainage.
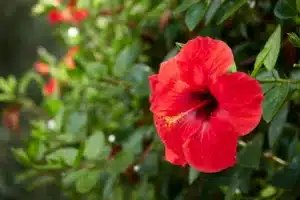
Next, plant the Chinese Hibiscus in a hole that’s slightly wider than the root ball. Water thoroughly after planting to help settle the soil and encourage root growth.
When caring for your Chinese Hibiscus, it’s important to provide regular water and fertilizer. Water deeply once a week, or more often during hot, dry weather. Apply a balanced fertilizer every two to four weeks during the growing season to promote healthy growth and blooming.
To keep your Chinese Hibiscus looking their best, deadhead the flowers as they fade. This will encourage continued blooming and prevent the plant from going to seed too quickly. You can also prune the plant to maintain its shape and size.
Chinese Hibiscus is a relatively low-maintenance plant that can thrive in a variety of growing conditions. It is also a popular choice for indoor cultivation as long as the plant receives adequate light and humidity. With these simple planting tips, you can enjoy a beautiful display of Chinese Hibiscus in your garden, landscape, or indoor space all season long.
14. Clary Sage
Clary Sage, also known as Salvia sclarea, is a lovely and fragrant herb that produces stunning spikes of pink, purple, and white flowers. This perennial plant is native to the Mediterranean and is a popular choice for herb gardens, borders, and containers. Here are some helpful planting tips for Clary Sage:
First, choose a planting location that receives full sun to partial shade. Clary Sage prefers well-draining soil that’s not too heavy or compact. If your soil is heavy or clay-like, amend it with compost or other organic matter to improve drainage.
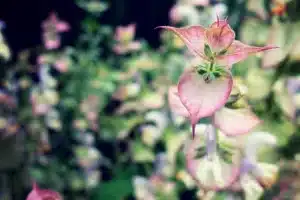
Next, plant the Clary Sage in a hole that’s slightly wider than the root ball. Water thoroughly after planting to help settle the soil and encourage root growth.
When caring for your Clary Sage, it’s important to provide regular water and fertilizer. Water deeply once a week, or more often during hot, dry weather. Apply a balanced fertilizer every two to four weeks during the growing season to promote healthy growth and blooming.
To keep your Clary Sage looking its best, deadhead the flowers as they fade. This will encourage continued blooming and prevent the plant from going to seed too quickly. You can also prune the plant to maintain its shape and size.
Clary Sage is a versatile herb that can be used for a variety of purposes, including aromatherapy, culinary, and medicinal. It is easy to grow and maintain, making it a great choice for novice gardeners and herb enthusiasts. With these simple planting tips, you can enjoy a beautiful display of Clary Sage in your herb garden, border, or container all season long.
15. Columbine
Columbines, also known as Aquilegia, are a beautiful and delicate perennial plant that produce unique and intricate flowers in shades of pink, purple, blue, red, and yellow. These plants are native to North America and are a popular choice for adding color and texture to gardens, borders, and containers. Here are some helpful planting tips for Columbines:
First, choose a planting location that receives partial shade to full sun. Columbines prefer well-draining soil that’s not too heavy or compact. If your soil is heavy or clay-like, amend it with compost or other organic matter to improve drainage.
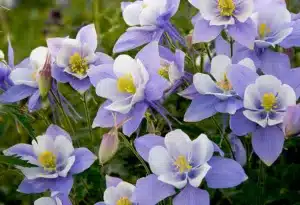
Next, plant the Columbines in a hole that’s slightly wider than the root ball. Water thoroughly after planting to help settle the soil and encourage root growth.
When caring for your Columbines, it’s important to provide regular water and fertilizer. Water deeply once a week, or more often during hot, dry weather. Apply a balanced fertilizer every four to six weeks during the growing season to promote healthy growth and blooming.
To keep your Columbines looking their best, deadhead the flowers as they fade. This will encourage continued blooming and prevent the plant from going to seed too quickly. You can also remove any damaged or dead leaves to improve the overall appearance of the plant.
There are many different cultivars available, including those with double blooms and unique color combinations. Columbines are a low-maintenance and hardy plant that can thrive in a variety of growing conditions, making them a great choice for gardeners of all skill levels. With these simple planting tips, you can enjoy a beautiful display of Columbines in your garden, border, or container all season long.
16. Cornflower
Cornflowers, also known as Centaurea cyanus, are a delightful and charming annual plant that produces stunning blue, pink, white, and purple flowers. These plants are native to Europe and are a popular choice for adding color and texture to gardens, borders, and containers. Here are some helpful planting tips for Cornflowers:
First, choose a planting location that receives full sun. Cornflowers prefer well-draining soil that’s not too heavy or compact. If your soil is heavy or clay-like, amend it with compost or other organic matter to improve drainage.
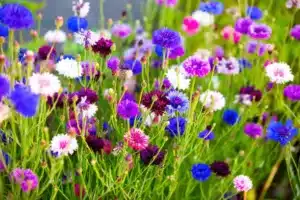
Next, plant the Cornflowers in a hole that’s slightly wider than the root ball. Water thoroughly after planting to help settle the soil and encourage root growth.
When caring for your Cornflowers, it’s important to provide regular water and fertilizer. Water deeply once a week, or more often during hot, dry weather. Apply a balanced fertilizer every four to six weeks during the growing season to promote healthy growth and blooming.
To keep your Cornflowers looking their best, deadhead the flowers as they fade. This will encourage continued blooming and prevent the plant from going to seed too quickly. You can also remove any damaged or dead leaves to improve the overall appearance of the plant.
Cornflowers are a versatile and easy-to-grow annual plant that can be grown in a variety of settings, including garden beds, borders, and containers. With these simple planting tips, you can enjoy a beautiful display of Cornflowers in your garden or landscape all season long.
17. Calendula
Calendula, also known as Calendula officinalis, is a cheerful and bright annual plant that produces masses of yellow and orange daisy-like flowers. These plants are native to the Mediterranean and are a popular choice for adding color and texture to gardens, borders, and containers. Here are some helpful planting tips for Calendula:
First, choose a planting location that receives full sun to partial shade. Calendula prefers well-draining soil that’s not too heavy or compact. If your soil is heavy or clay-like, amend it with compost or other organic matter to improve drainage.
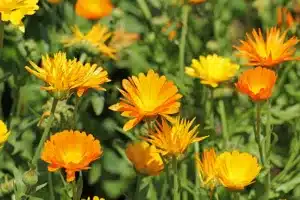
Next, plant the Calendula in a hole that’s slightly wider than the root ball. Water thoroughly after planting to help settle the soil and encourage root growth.
When caring for your Calendula, it’s important to provide regular water and fertilizer. Water deeply once a week, or more often during hot, dry weather. Apply a balanced fertilizer every four to six weeks during the growing season to promote healthy growth and blooming.
To keep your Calendula looking their best, deadhead the flowers as they fade. This will encourage continued blooming and prevent the plant from going to seed too quickly. You can also remove any damaged or dead leaves to improve the overall appearance of the plant.
Calendula is a low-maintenance and easy-to-grow annual plant that can thrive in a variety of growing conditions. It is also a popular choice for medicinal use, as the plant is believed to have anti-inflammatory and wound-healing properties. With these simple planting tips, you can enjoy a beautiful display of Calendula in your garden, border, or container all season long.
18. Coneflower
Coneflowers, also known as Echinacea, are a beautiful and hardy perennial plant that produces distinctive and attractive flowers in shades of pink, purple, white, and orange. These plants are native to North America and are a popular choice for adding color and texture to gardens, borders, and containers. Here are some helpful planting tips for Coneflowers:
First, choose a planting location that receives full sun to partial shade. Coneflowers prefer well-draining soil that’s not too heavy or compact. If your soil is heavy or clay-like, amend it with compost or other organic matter to improve drainage.
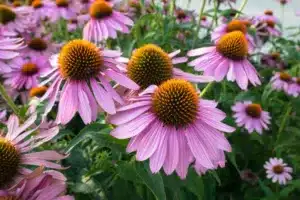
Next, plant the Coneflowers in a hole that’s slightly wider than the root ball. Water thoroughly after planting to help settle the soil and encourage root growth.
When caring for your Coneflowers, it’s important to provide regular water and fertilizer. Water deeply once a week, or more often during hot, dry weather. Apply a balanced fertilizer every four to six weeks during the growing season to promote healthy growth and blooming.
To keep your Coneflowers looking their best, deadhead the flowers as they fade. This will encourage continued blooming and prevent the plant from going to seed too quickly. You can also remove any damaged or dead leaves to improve the overall appearance of the plant.
There are many different cultivars available, including those with double blooms and unique color combinations. Coneflowers are a hardy and low-maintenance plant that can thrive in a variety of growing conditions, making them a great choice for gardeners of all skill levels. With these simple planting tips, you can enjoy a beautiful display of Coneflowers in your garden, border, or container all season long.
19. Crown Imperial
Crown Imperials, also known as Fritillaria imperialis, are a striking and unusual perennial plant that produces tall spikes of drooping, bell-shaped flowers in shades of red, yellow, and orange. These plants are native to the Middle East and are a popular choice for adding drama and flair to gardens and landscapes. Here are some helpful planting tips for Crown Imperials:
First, choose a planting location that receives full sun to partial shade. Crown Imperials prefer well-draining soil that’s not too heavy or compact. If your soil is heavy or clay-like, amend it with compost or other organic matter to improve drainage.
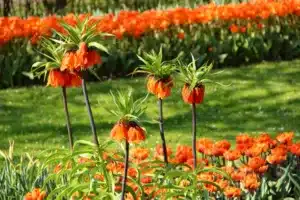
Next, plant the Crown Imperials in a hole that’s deep enough to accommodate the bulb and the surrounding roots. Water thoroughly after planting to help settle the soil and encourage root growth.
When caring for your Crown Imperials, it’s important to provide regular water and fertilizer. Water deeply once a week, or more often during hot, dry weather. Apply a balanced fertilizer every four to six weeks during the growing season to promote healthy growth and blooming.
To keep your Crown Imperials looking their best, deadhead the flowers as they fade. This will encourage continued blooming and prevent the plant from going to seed too quickly. You can also remove any damaged or dead leaves to improve the overall appearance of the plant.
Crown Imperials are a unique and eye-catching plant that can add a touch of elegance and sophistication to any garden or landscape. With these simple planting tips, you can enjoy a beautiful display of Crown Imperials in your garden or landscape for years to come.
20. Candytuft
Crown Candytuft, also known as Iberis sempervirens, is a lovely and hardy perennial plant that produces masses of delicate white or pink flowers in early spring. These plants are native to the Mediterranean and are a popular choice for rock gardens, borders, and containers. Here are some helpful planting tips for Crown Candytuft:
First, choose a planting location that receives full sun to partial shade. Crown Candytuft prefers well-draining soil that’s not too heavy or compact. If your soil is heavy or clay-like, amend it with compost or other organic matter to improve drainage.

Next, plant the Crown Candytuft in a hole that’s slightly wider than the root ball. Water thoroughly after planting to help settle the soil and encourage root growth.
When caring for your Crown Candytuft, it’s important to provide regular water and fertilizer. Water deeply once a week, or more often during hot, dry weather. Apply a balanced fertilizer every four to six weeks during the growing season to promote healthy growth and blooming.
To keep your Crown Candytuft looking its best, deadhead the flowers as they fade. This will encourage continued blooming and prevent the plant from going to seed too quickly. You can also trim back any dead or damaged foliage to improve the overall appearance of the plant.
Crown Candytuft is a low-maintenance and easy-to-grow perennial plant that can provide an early burst of color to your garden or landscape. With these simple planting tips, you can enjoy a beautiful display of Crown Candytuft in your garden, border, or container all season long.
And There You Have Your Flowers Starting With C
In conclusion, we’ve explored 20 captivating flowers that all start with the letter C. From the vibrant and showy Chrysanthemum to the delicate and elegant Crown Candytuft, these flowers offer a wide range of colors, shapes, and textures that can add beauty and interest to any garden or landscape.
Whether you’re a seasoned gardener or a novice, there’s a C flower out there for you. With the right planting tips and care, you can enjoy a stunning display of these captivating flowers all season long.
So, the next time you’re planning your garden or looking for ways to add color and interest to your landscape, consider adding some of these wonderful C flowers to your list. With their beauty and charm, they’re sure to be a delightful addition to your outdoor space.

Hi there, I’m Mark Apletree, a gardening enthusiast with a passion for gardening, and gardening tools. I’ll be your go-to guide for all things related to gardening. The purpose of this website is to assist you in selecting the most suitable garden gear that meets your specific requirements.
See All Posts
